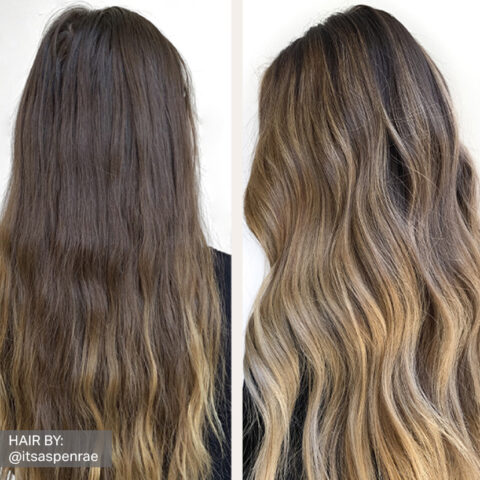

Save the Heat for the Honeymoon With This Minimal Heat Hair Updo
by Ashley Krupa Berg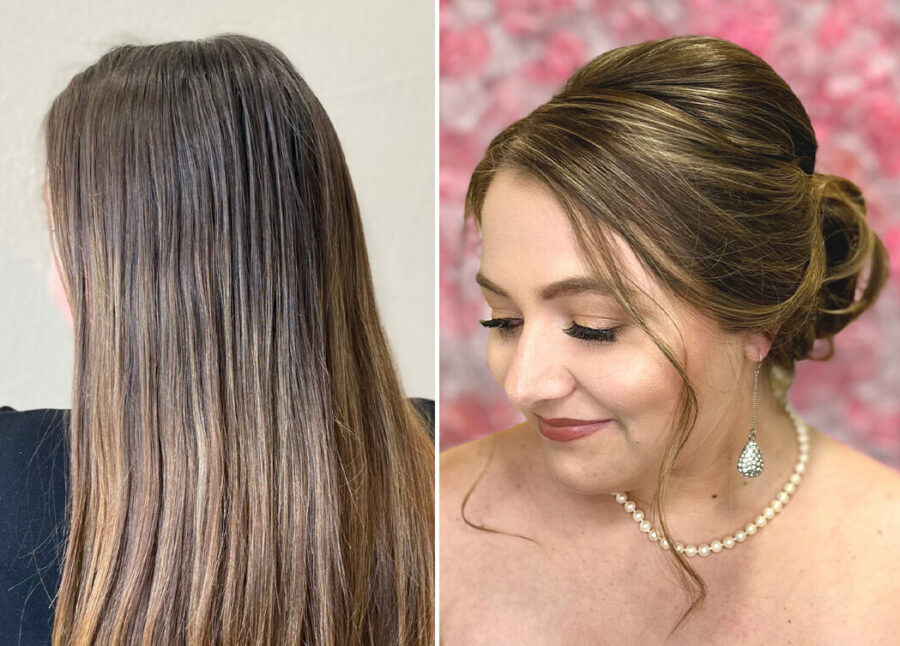 https://youtu.be/uVOo0AcbbP0
Formulas
Lighting Formula
40g Pure Light Ultra Lightener + 80g 20 Volume Creme Developer
40g Pure Light Ultra Lightener + 80g Zero Lift Creme Developer
Toning Formula
10g ChromaSilk Express Tones Clear – Blondes + 5g ChromaSilk Express Tones Pearl – Blondes + 5g ChromaSilk Express Tones Violet – Blondes + 30g Zero Lift Creme Developer
Application
Step 1: Section the Hair
Part the client’s hair where their natural part falls and starting about 2” back from the hairline, take a perimeter halo section all the way around the head.

Step 2: Prep the Hair
Prep the hair by spraying Purify & Revive PRIME Demineralizing Spray generously throughout the hair, combing through for even distribution and allowing it to sit for 3 minutes (no rinsing or shampoo required). This will diminish any hard water minerals prior to any chemical service.

Pro Tip
Minerals are found in 85% of household water which can cause lightener to puff and swell or color to take inaccurately.
Step 3: Express Halo Highlight
Taking diagonal back sections, create highlights throughout the perimeter halo using microstitches closer to the hairline and stitches throughout the rest of the hair applying Lightening Formula 1 to the new regrowth and Lightening Formula 2 to bump up the previously lightened ends if needed.
Optional: If they have a lot of regrowth, take a small mohawk section on the top of the head to add a few additional horizontal highlights.


Pro Tip
Diagonal sections eliminate harsh lines and create a softer blend.
Process up to 55 minutes at room temperature checking every 5-10 minutes until you reach a Level 9. Shampoo only with PRAVANA’s Color Protect Cleanse, towel-dry and apply Silk Degrees Prep and Treat for 5 minutes at the sink, rinse and towel-dry the hair again.
Step 4: Tone the Hair
Apply the Toning Formula beginning your application in the back of the hair and ending at the hairline.

Pro Tip
Starting your application in the back allows the front to remain the brightest.
Process 5 minutes at room temperature. Rinse well and towel-dry. Prep the hair to hold the style by detangling with PRAVANA’s Intense Therapy Leave-In Treatment, applying PRAVANA’s Full Volume directly on the base and throughout the hair and applying PRAVANA’s Hydra Pearl Oil to the ends of the hair first, then lightly on the top combing all of the product through for even distribution. Blow dry the hair smooth using your favorite paddle or round brush.
Step 5: Create Bubble Braids
Beginning in the nape area, take a 3” horizontal section and divide in half, then lightly spray with PRAVANA’s Super Shape Hair spray. Softly tease the hair at the base and apply a clear rubber band about 4” down the section. Apply a second clear rubber band about 3” below the first, then holding on to the rubber band gently pull out each side of the hair above the band creating a “bubble”. Apply the next rubber band 3” down and repeat the same process until you run out of hair. Continue creating bubble braids throughout the entire back section dividing the hair into three or four sections in wider areas of the head and two sections in smaller areas of the head.

Pro Tip
It is easier to create bubbles one at a time before adding the next rubber band.
Step 6: Build the Style
Beginning in the nape area, start building your style by criss-crossing and pinning the bubble braids using your own creativity. Lightly spray each section after you finish pinning.

Pro Tip
Use the “bubbles” to hide the rubber bands of the previous section. Place the wavy side of the bobby pins against the head to secure the sections.
Step 7: Connect the Sides
Use the side bubble braids to connect the sides to the back if there is enough hair. If the client has a deep side part, you may only have one side bubble braid on the thicker side.

Pro Tip
For bubble braids on the sides that will fall partially over the ears, apply your first hair band 1-2” further down than the others so your first rubber band connects to the back and does not show on the side.
Step 8: Finish the Front
Curl the front pieces softly beginning your curl 1-2” off base. Divide into 1-2” sections, spray lightly with PRAVANA’s Super Shape Hair Spray and very lightly tease the base underneath the hair so it will not show. Twist the section, then twist again gently fanning out the top of the section and pinning it into the back. Repeat with the remaining sections leaving out a few tendrils around the face for softness.

Pro Tip
Use your hair pins to flatten puffy sections or to connect sections softly.
Step 9: Attach the Veil
When your style is complete, secure the veil by placing the rounded side of the comb against the head underneath the upstyle if you want the style to show, or on the top of the upstyle if you prefer the veil to show. Secure the veil by placing two bobby pins on each side wavy side down against the head.

Reveal