

 https://youtu.be/tYqUCi0kbz4
Formulas
Lightening Formula
30g Pure Light Ultra Lightener + 60g Chosen Creme Developer
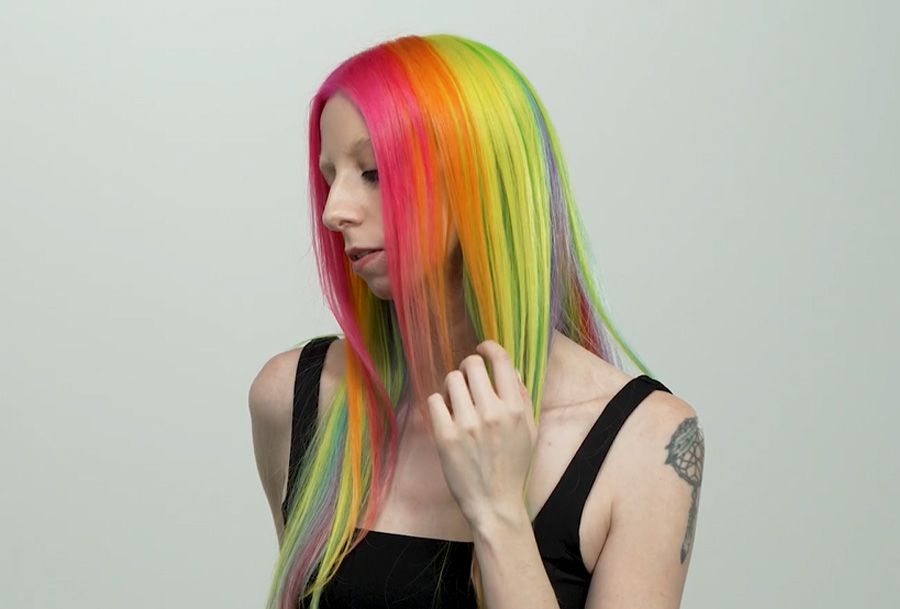
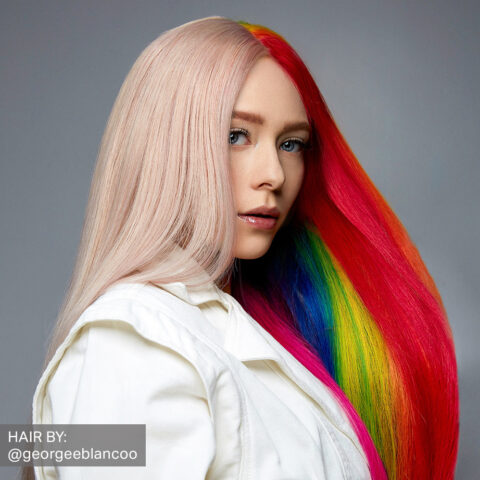
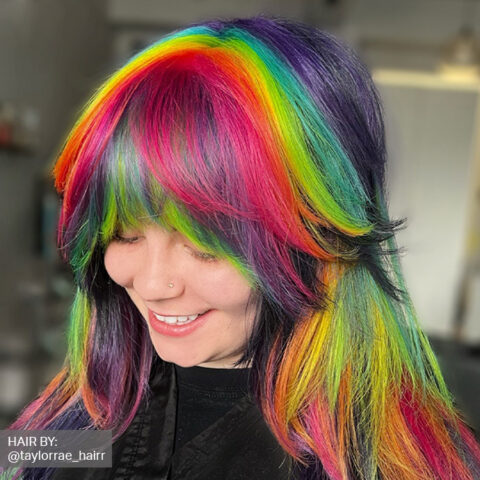
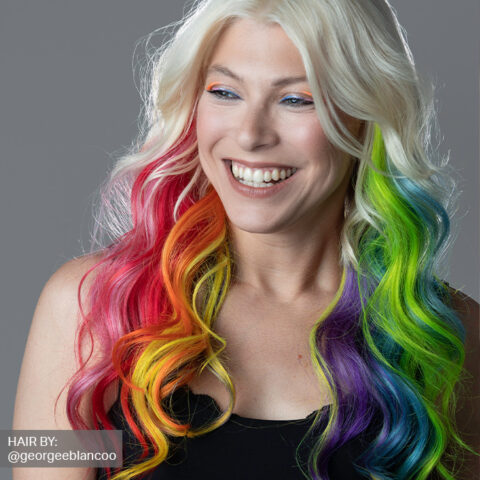
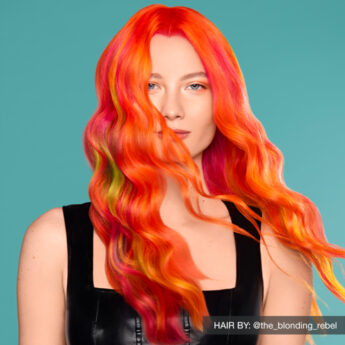
VIVIDS Neon Rainbow Formulas
Formula 1 (Violet): 10g ChromaSilk VIVIDS Original Violet + 30g ChromaSilk VIVIDS Clear-Pastel
Formula 2 (Blue): 20g ChromaSilk VIVIDS Neons Neon Blue + 10g ChromaSilk VIVIDS Original Aquamarine
Formula 3 (Green): 15g ChromaSilk VIVIDS Neons Neon Green + 15g ChromaSilk VIVIDS Original Clear-Pastel
Formula 4 (Yellow): 15g ChromaSilk VIVIDS Neons Neon Yellow + 15g ChromaSilk VIVIDS Original Clear-Pastel
Formula 5 (Orange): 15g ChromaSilk VIVIDS Neons Neon Orange + 15g ChromaSilk VIVIDS Original Sunstone
Formula 6 (Pink): 15g ChromaSilk VIVIDS Neons Neon Pink + 10g ChromaSilk VIVIDS Original Magenta
Application
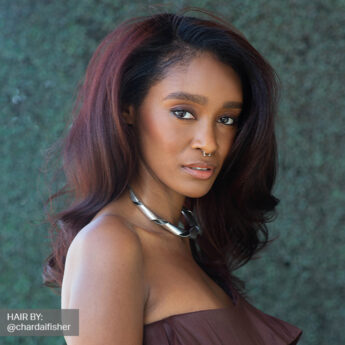
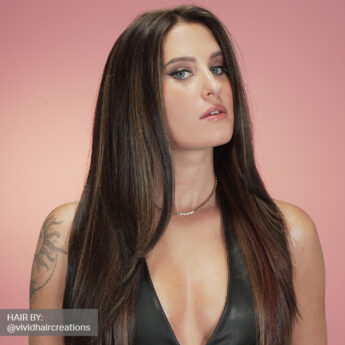
Part I. Create a Scroll-Stopping Look
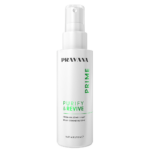
Step 1: Prep the Hair
Prep the hair by spraying Purify & Revive PRIME Demineralizing Spray generously throughout the hair, combing through for even distribution and allowing to sit for 3 minutes (no rinsing or shampoo required) to diminish any hard water minerals.
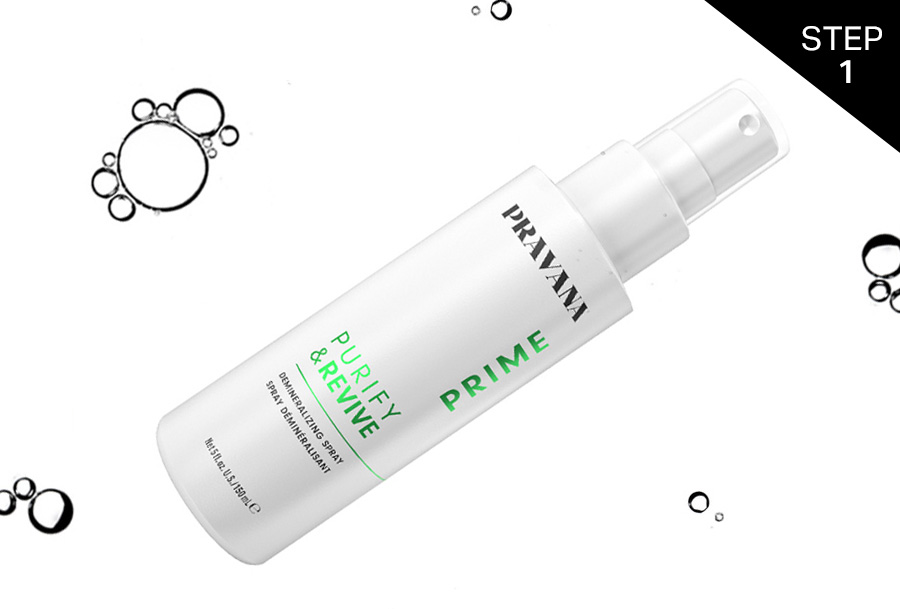
Pro Tip
Minerals are found in 85% of household water which can cause lightener to puff and swell or color to take inaccurately.
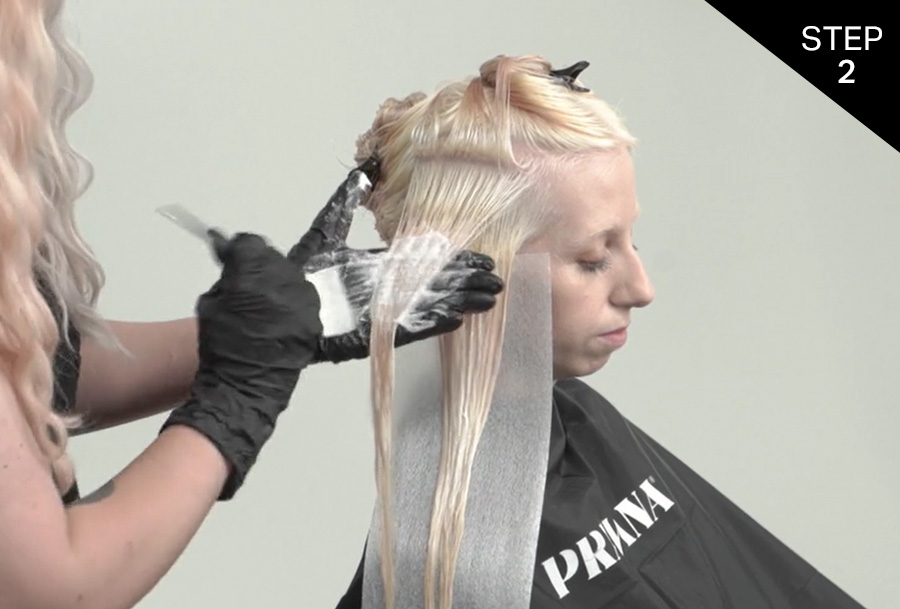
Step 2: Global Blonding
Using your favorite Global Blonding technique, pre-Lighten the hair to a Level 9/10 utilizing the Lightening Formula.
Pro Tip
To diminish previous ChromaSilk VIVIDS shades, apply Pure Light Ultra Lightener + 2 parts Zero Lift Developer for 5-15 minutes.
Shampoo the hair with PRAVANA Intense Therapy Cleanse. Rinse, towel-dry and apply Silk Degrees Prep and Treat for 5 minutes at the basin to equalize the porosity and provide anchoring sites for your color application. Rinse and dry the hair completely.
Step 3: Sectioning
Divide the hair into two sections by taking a parting from nose to nape. Create 1-2” sub-sections by taking diagonal forward partings from the center parting towards the face.
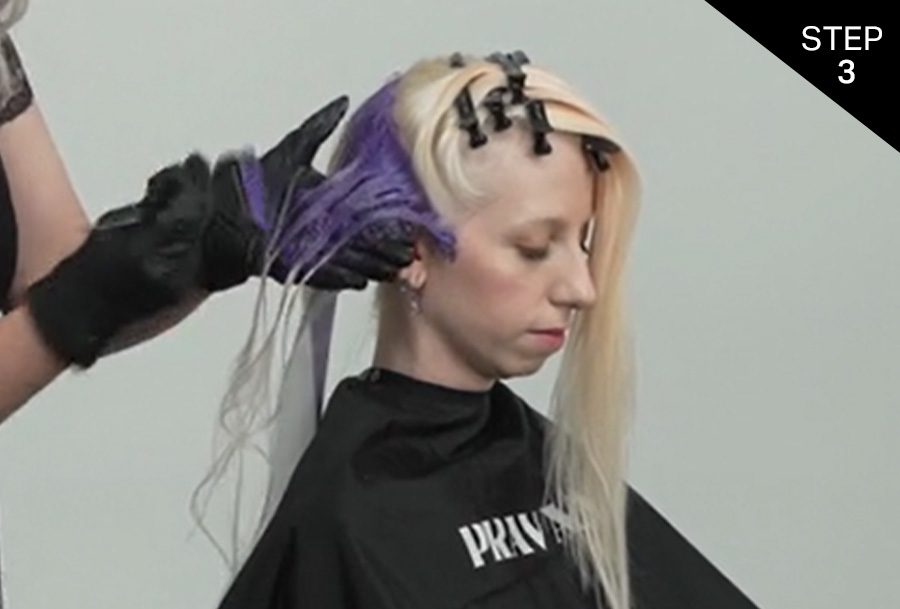
Pro Tip
Utilizing large diagonal sections will create bold dimension for your rainbow look.
Step 4: VIVIDS Application
Apply the ChromaSilk VIVIDS Neon Rainbow Formulas from roots to ends to each section taking 1/2” subsections to ensure optimal saturation in your desired pattern.
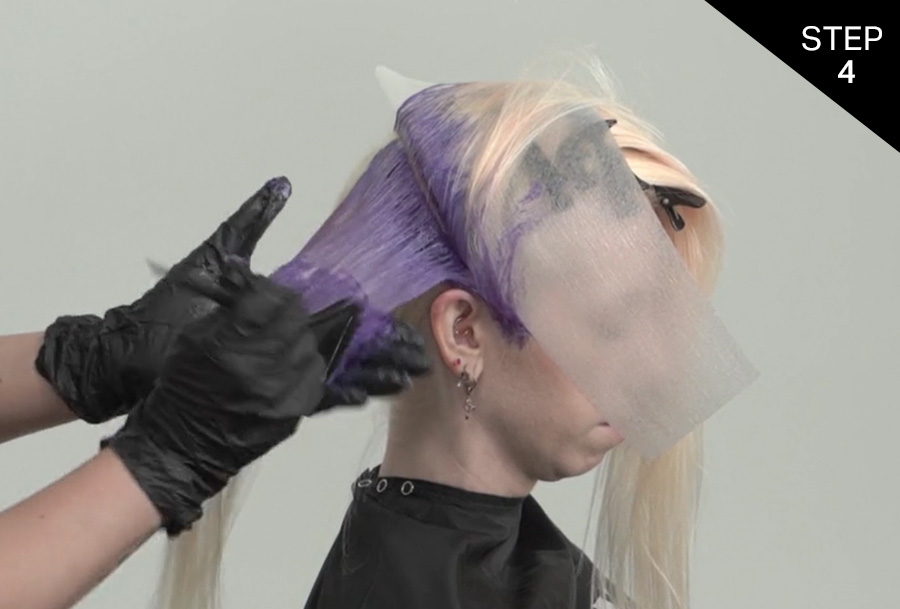
Pro Tip
Utilize the 3-inch Rule applying VIVIDS generously to both sides of the hair reloading your brush every 3 inches.
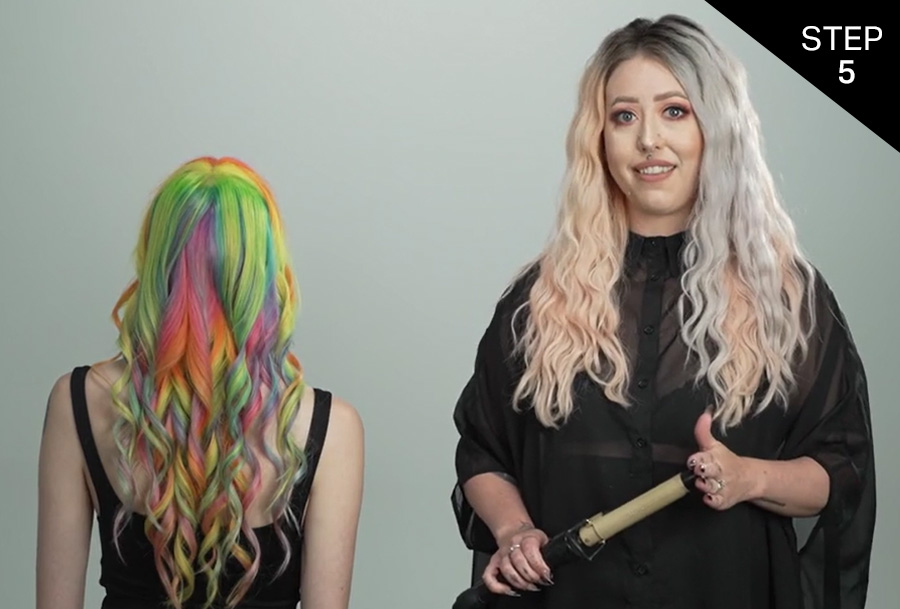
Process all 30 minutes at room temperature. Rinse with cold water and high water pressure until the water runs clear, condition with PRAVANA Color Protect Condition and style as desired.
Step 5: Styling
Take out a veil section on the top of the head and clip it out of your way. For the hair underneath, create a soft, natural beach wave utilizing a 1-1/4” Marcel curling iron, alternating curling to the right and curling to the left. For the veil section, direct all the curls back away from the face.
Part II. Set the Stage
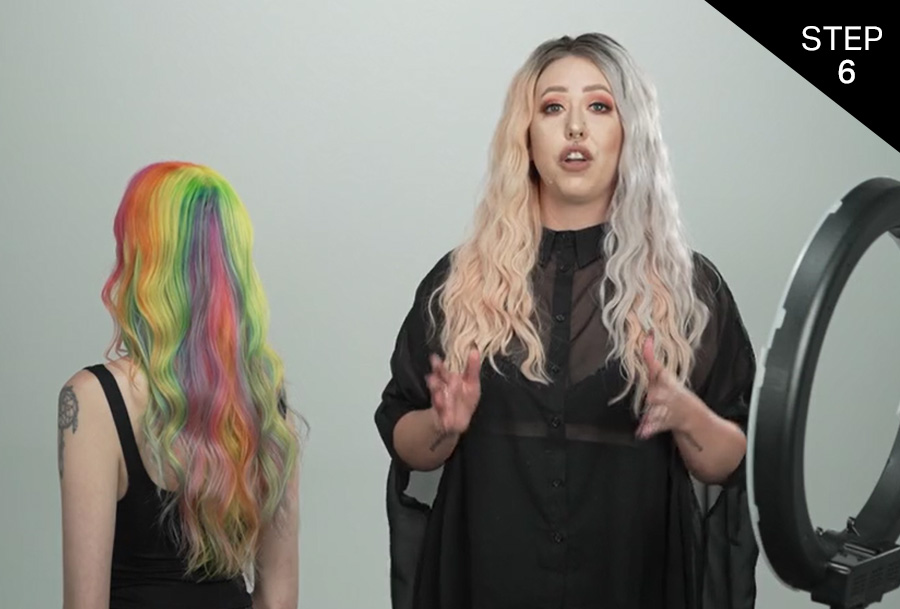
Step 6: Lighting
For indoor photography and filming, choose a clean white background and utilize a ring light for optimal illumination. When shooting outside, choose “open shade” (outdoors in shade, but bright light) and look for a complimentary background like a light concrete wall which adds a little texture.
Pro Tip
Shoot through the center of the ring light for the best shots indoors and utilize the wind for boomerang shots when outdoors.
Part III. What to Capture
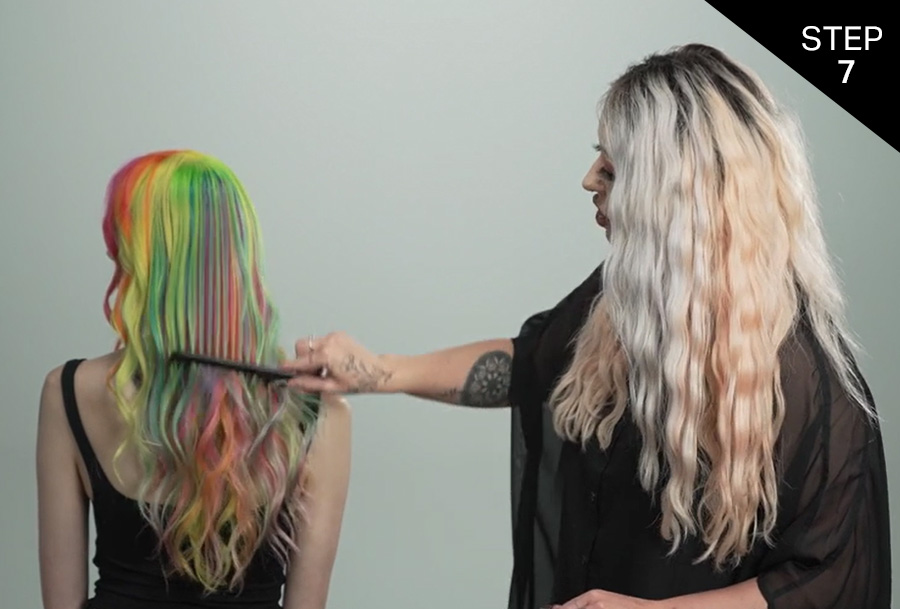
Step 7: Combing Out the Curls
Spray the hair lightly 2-3 times with PRAVANA Intense Therapy Leave-In Treatment and use a wide-tooth comb. Ask your client to look to the left, then look to the right and then back to center while you comb.
Pro Tip
Place your hand under the curls and give them a little shake.
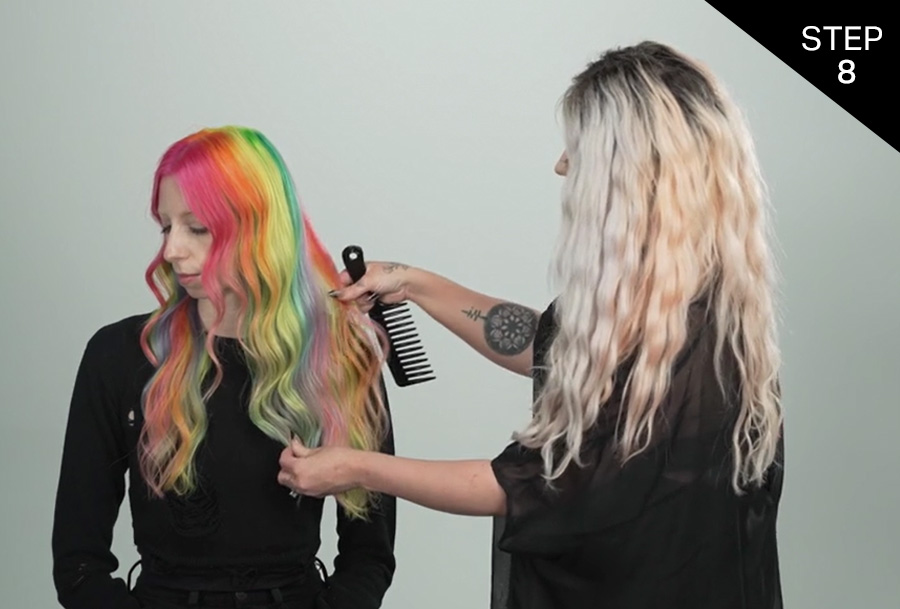
Step 8: Positioning the Model
For shots from the front, direct your client to turn their head to one side and fan out the hair to create the illusion of more hair. From the back, have them place their hands underneath their hair, then ask them to give the hair a shake and film in slo-motion.
Pro Tip
After they place their hands under their hair, section out the top layer to cover their nails.
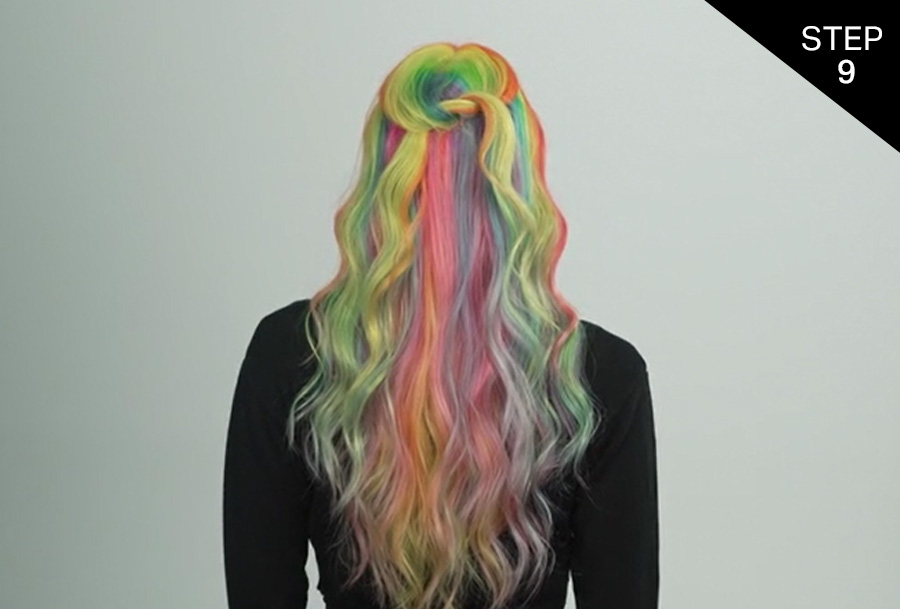
Step 9: Switch up the Styling
Switching up the styling retains the interest of the viewer.
Pro Tip
Create a new style by simply taking a section from each side and looping them together.
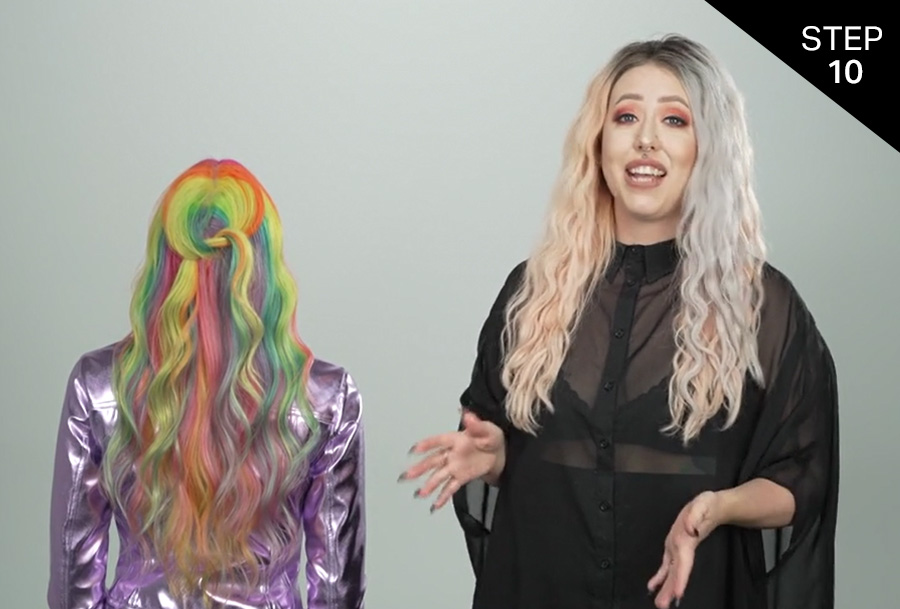
Step 10: Change the Wardrobe
Changing wardrobe changes the look of the color. Different color tops and jackets pick up different shades of the rainbow giving your look new interest.
Pro Tip
Keep a few simple wardrobe pieces on-hand – black and white t-shirts and a moto jacket.
Reveal